There is little more annoying than leaking block foundation walls; fortunately it is possible to fix a wet basement on the inside by installing interior weeping tile systems/ interior perimeter drainage systems.
On this page:
What is an interior weeping tile system?
The steps involved in installing an interior weeping tile system
How water enters and pools within a concrete block wall
Illustrated steps involved in installing an interior weeping tile system
What is an interior weeping tile system?
An interior weeping tile system is also referred to as an internal perimeter drain system. This system is a method of waterproofing foundation walls from the inside as an alternative to foundation excavation and waterproofing. Interior weeping tile systems are mostly installed to waterproof leaking concrete block foundations.
Compared to exterior waterproofing, an interior weeping tile system is less expensive (since no excavation is involved) and is a proven, highly effective basement waterproofing method. This waterproofing system is so reliable that some very large companies sell this type of system to deal with just about every wet basement situation. Waterproofing the basement on the inside is often the approach of choice given the destructiveness and cost of foundation excavation.
Interested in information about conventional exterior weeping tile installation? Click to read about weeping tile.
Interior weeping tile systems keep a basement dry by providing drainage for the water that pools within the block foundation walls that subsequently seeps onto the basement floor. This system is also very effective for dealing with a high water table under the basement floor slab, and for any water that leaks through foundation cracks. The interior weeping tile system is a basement waterproofing system that will keep your basement perfectly dry, and is similar to the weeping tile system installed on the exterior, at the base of your foundation.
Interior weeping tile installed next to the footing, draining into sump pump liner
This basement waterproofing system involves the installation of a drainage system against some or all of the exterior walls of your basement beneath the basement floor; therefore, no digging outside the home is required. The system drains water at the footing of the foundation in much the same way as exterior weeping tile does. An interior weeping tile system allows water, which has pooled in a concrete block / cinder block foundation, to drain behind a membrane on the wall. Draining behind the membrane eliminates any risk of water seepage onto the basement floor. By draining the cinderblocks and evacuating any ground water, the interior weeping tile system helps to extend the useful life of the foundation. Properly installed, an interior weeping tile system will keep your basement dry for the life of your home. Here’s what a completed interior perimeter drain system installation looks like:
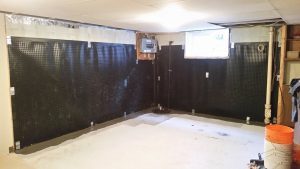
The perimeter drain system is installed beneath the floor and membrane is installed on the exterior walls
Steps Involved in Installing Interior Weeping Tile Systems
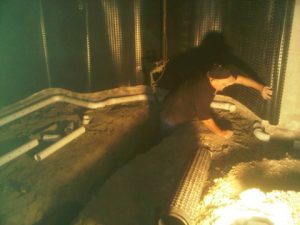
Installation of this perimeter drainage system requires access to bare basement walls inside the home. In finished basements, the lower part or entire stud walls are removed.
Here are the installation steps:
1. The basement floor slab along the foundation walls is jackhammered open in order to expose the footing and to excavate a trench for the installation of drain tile;
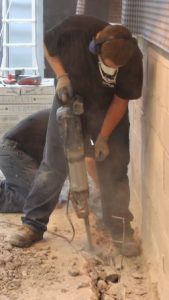
The basement floor needs to be jackhammered in order to create a trench
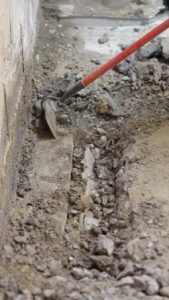
With the basement floor open the footing is now visible
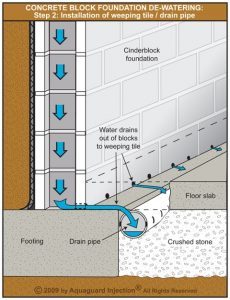
2. The fully exposed bottom course of concrete blocks have weeping holes drilled into the hollow cavities within the blocks;
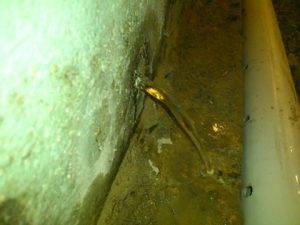
Alot of water can be trapped in a block foundation wall
A perforated pipe collects water draining out of the block foundation wall
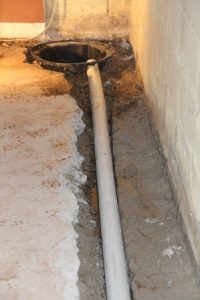
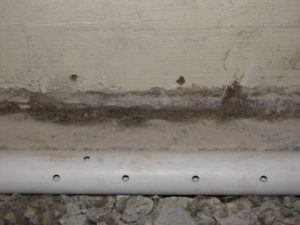
3. A perforated drain pipe is installed next to the footing;
It is important to hug the contour of the footing to have reliable interior perimeter drain system performance

Perforated pipe / drain tile installed along foundation footing
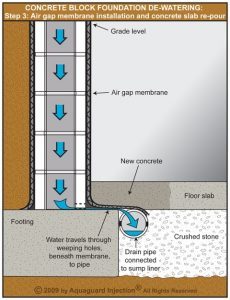
4. An air gap membrane is installed along the wall;
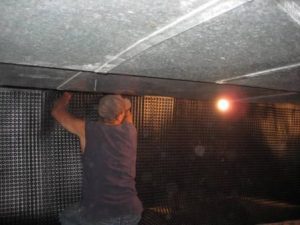
Air gap membrane / foundation wrap is affixed to the foundation wall
It is imperative that the drain tile beneath the floor be covered by the foundation wrap
5. In the absence of a suitable sump pump liner, a new one is installed beneath the floor;
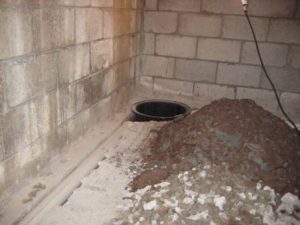
Sump pumps are typically located in a corner or out of the way location
6. The perimeter drain pipe is routed to the sump liner to evacuate the water collected from the blocks. The water is pumped outside by the sump pump. Note: it is illegal in most municipalities to dispose of this water by connecting to the floor drain; and
Perimeter drain pipe / weeping tile empties into the sump liner
7. The drain pipe and the drainage membrane are positioned and new concrete is poured over top and levelled. When completed, all that is visible is a scar in the floor along the wall. Then there is a membrane fastened to the wall and a sump pump discharge pipe to the exterior.
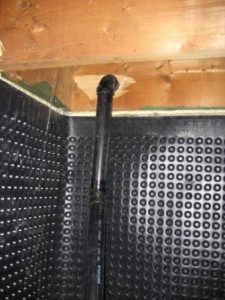
Sump discharge pipe leading to the exterior
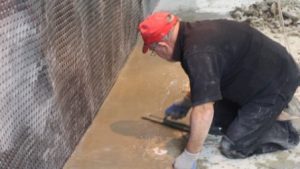
Trench along footing cemented on completion
How water enters and pools within a concrete block foundation:
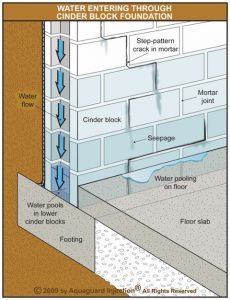
The typical appearance of block foundation leaks
Illustrated steps involved in installing an interior weeping tile system:

Water must not remain inside a block foundation wall – drain holes allow the water in the wall to drain out
Interior weeping tile / drain tile is installed along the footing under the basement floor
With foundation wrap installed onto the inside wall and over the pipe water can only go to the weeping tile
Water drains behind the foundation wrap to the weeping tile which empties into the sump liner
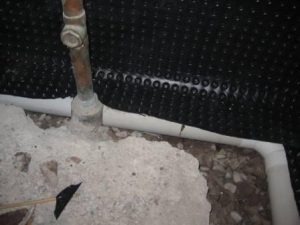
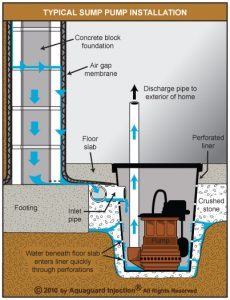
Below is a typical sump pump installation that is part of the interior weeping tile system.
Note: Instead of having an unsightly discharge pipe from the centre of the liner, we can hide the discharge pipe. This is done within your framed basement walls by modifying the configuration of the discharge so that it is “discrete”. This is installed beneath the concrete floor and travels up the wall behind the drywall.
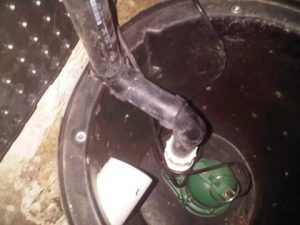
Sump pump with discharge pipe located close to the foundation wall
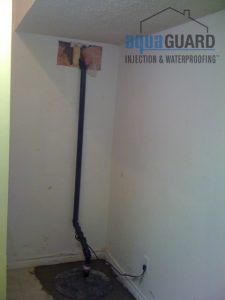
Sump pump discharge pipe located against the drywall instead of behind it
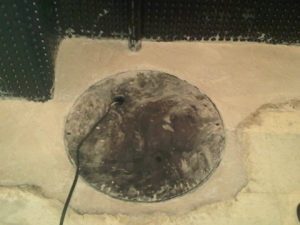
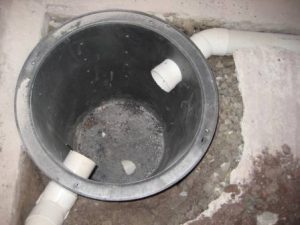
Typical appearance of sump liner cover